For a while I have been meaning to start posting screencasts of some of my work to spread the word, and to explain some of the details that are difficult to describe in text.

After much tinkering, I think that I have arrived at a nice setup and have found a good way to distribute the screencasts, making them available to stream over the web or to download for consumption in your own sweet time.
In this post, I'll share my findings so that you can set yourself up with a similar environment. I use a Mac, and so these tips are levelled squarely at the Mac users out there. Sorry to everyone else, but I'm just writing about what I know.
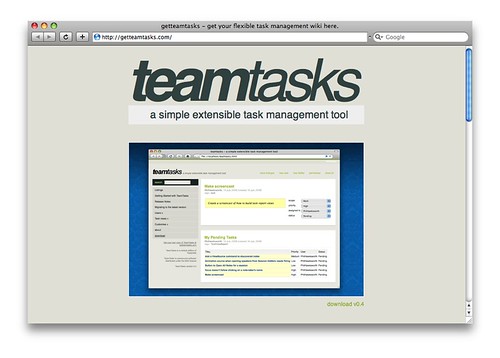
Here is an example screencast. The best view is in HD over here.
I think that in order to create a good screencasts you need to think about the following things:
- Good content. Know what you're going to say/show and prepare yourself in advance.
- Have a clean environment on screen.
- Capture your content with the optimal settings.
- Compress your content correctly.
- Host and distribute your content in the most effective way.
Let's take a look at those in more detail.
1 - Good content
I think that it is worth practicing what you are going to show and getting everything ready in advance so that you don't waste any time. As far as having something compelling to show, I'm afraid that you're on your own on this one.
2 - Have a clean environment on screen.
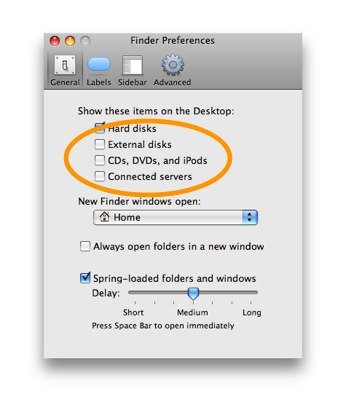
Removing clutter which can be distracting and untidy is a good way to help communicate you message more effectively. Since I don't want to have to disrupt the setup that I use for my everyday work, I created a new user on my Mac called Demo which I use not only for capturing screencasts, but also for when I need to use my laptop to give a presentation using a projector. Having this separate user account allows me to keep the desktop totally clear and to keep it set to the optimal screen resolution for captures and projection. I chose to hide any mounted drives and whatnot by modifying my Finder preferences. I also increased the font size and icon size in the Finder View Options.

There is also value in having a simple, clean wallpaper displayed. Again, the aim is to reduce noise and distractions. People don't all need to see the photos of your kids learning to ride a bike while they are trying to absorb what you are demonstrating.
3 - Capture your content with the optimal settings.
I chose to use SnapzPro as my screen capture software. There are others, but this suited my needs and worked well for me. The screen resolution that you choose is important here. It took me a little time to settle on the right screen resolution. Initially I chose 1024x640. SnapzPro allows you to scale your capture which I did, choosing 70%. This gave a nice result which was big and clear and the file size was also good. In the end, I increased my screen resolution for capture to 1280x800 and didn't scale it down at all.
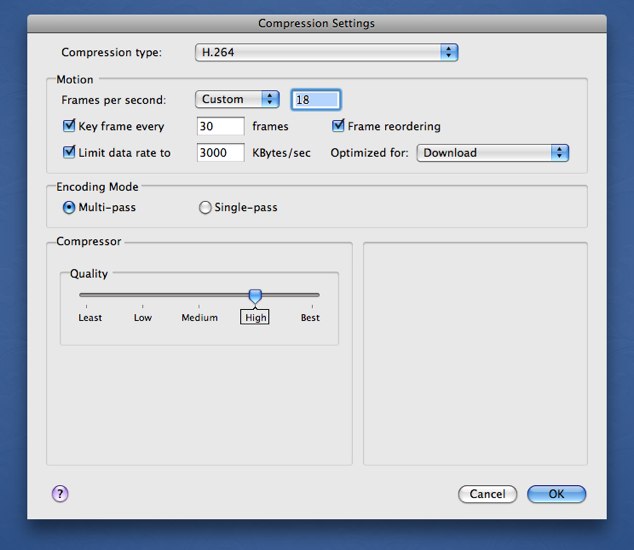
The reason for this is due to the channel that I chose to distribute my content through. More on that in point 5. I also lowered the frame rate a little. I dropped it to 18 frames per second in order to save a little on the file size.

I also like to let the viewer see what keys I am pressing during demonstrations. For this I used the rather handy Mousepose application. This also allows you to highlight the location of the mouse pointer.
4 - Compress your content correctly.
Now that you have recorded your content, you need to make sure that you compress it appropriately. This will of course be influenced by the your chosen hosting and distribution method. I compressed to h.264 to give good quality output while squeezing the file size down. My other settings are shown below.

5 - Host and distribute your content in the most effective way.
I wanted to be able to embed my screencasts on my website, but also allow any interested viewers to be able to download them to keep. Reducing any barriers to accessing the screencasts was important to me, so I didn't want to require the viewer to install any software before being able to view them. For that reason, a flash based video seemed sensible, due to the ubiquity of the flash player in browsers. I also wanted the screencasts to be of a suitably video quality. Vimeo.com will host HD content and stream content to your site. A bit of a sticking point at the moment is that they don't yet allow HD streaming to your embedded videos. You need to view them on their site for that. Apparently, this is will be available soon. They allow you to download the videos from their site and their fullscreen viewer is super-slick. Vimeo. fitted my requirements pretty well and I heartily recommend them. Their site is slick and they offer lots of support on how to best create your video content.